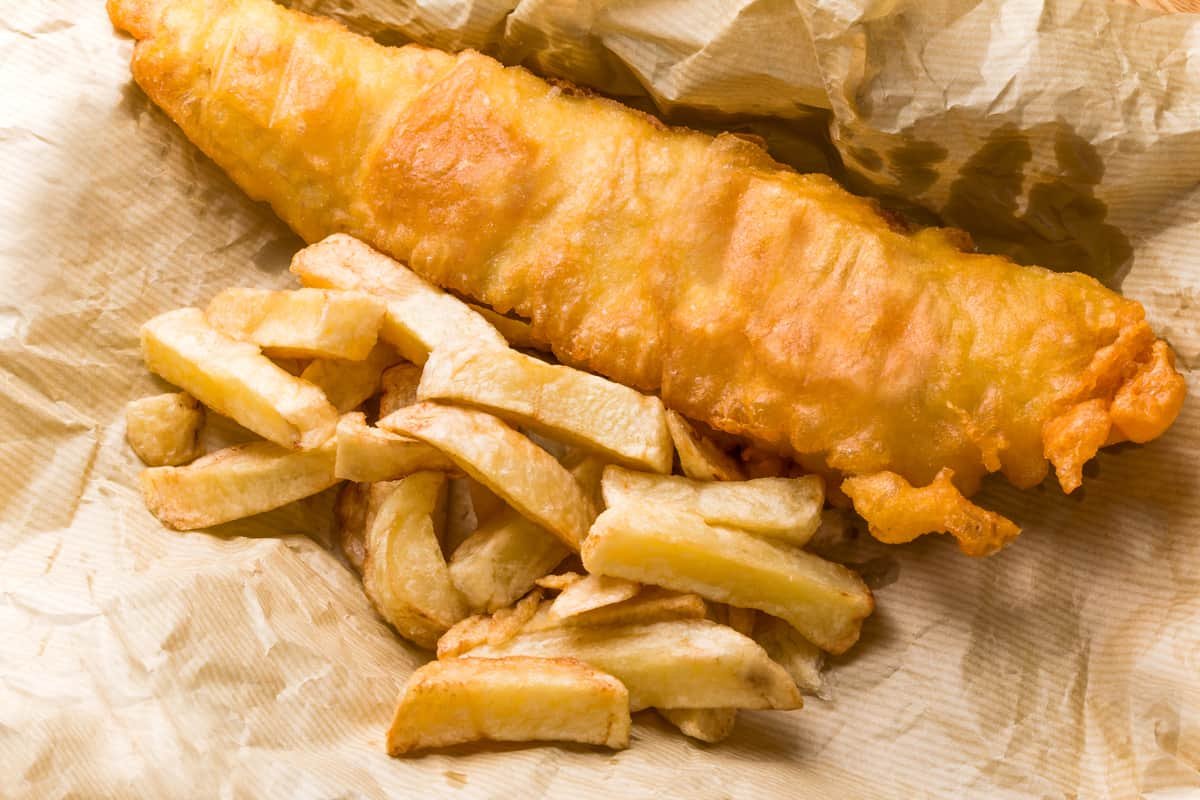
Nothing screams British comfort food quite like fish and chips. The crispy, golden batter encasing tender, flaky fish, paired with thick, fluffy chips, is a dish that’s warmed hearts and filled bellies for generations. Whether you’re craving a taste of the seaside or want to impress your mates with a homemade classic, this guide will walk you through making authentic British fish and chips in your own kitchen. Drawing from my own experience tinkering in the kitchen and tips from seasoned chippy pros, I’ll share everything you need to nail this iconic dish—crispy batter, perfect chips, and all.
Why Fish and Chips Is a British Icon
Fish and chips isn’t just food; it’s a cultural cornerstone. Born in the 19th century, it became a staple for working-class families, served up in newspaper-wrapped parcels from local chippies. Its affordability and heartiness made it a national treasure, and today, it’s still a go-to for a Friday night treat. Making it at home lets you capture that nostalgic magic while controlling the quality of every bite.
The History Behind the Dish
Fish and chips emerged in England’s industrial heartlands, with Jewish immigrants introducing fried fish and Belgian settlers bringing their chip-making expertise. By the 1860s, the two were married, creating the perfect pairing. Fun fact: during World War II, fish and chips was one of the few foods not rationed, keeping spirits high. Knowing this history adds a layer of appreciation when you recreate it at home.
Ingredients for Authentic Fish and Chips
The beauty of fish and chips lies in its simplicity, but quality ingredients are non-negotiable. Here’s what you’ll need to serve four:
- Fish: 4 cod or haddock fillets (6–8 oz each), fresh or frozen (thawed), skinless for easier frying.
- Potatoes: 2.5 lbs Maris Piper or Russet potatoes for chips—starchy varieties crisp up best.
- Flour: 2 cups all-purpose flour for the batter, plus extra for dredging.
- Baking Powder: 1 tsp to make the batter light and airy.
- Beer or Sparkling Water: 1.5 cups ice-cold for that signature crispiness (lager works wonders).
- Seasonings: Salt, black pepper, and a pinch of paprika for extra flavor.
- Oil: Vegetable or canola oil for frying—enough to fill your fryer or pot (about 2–3 liters).
- Extras: Malt vinegar, tartar sauce, and mushy peas for serving.
Pro tip: Keep everything cold before cooking. Chilled batter and fish ensure a crisper result, as I learned after a few soggy attempts early on.
Choosing the Right Fish
Cod and haddock are the gold standards for fish and chips—cod offers a mild flavor and flaky texture, while haddock has a slightly sweeter taste. Pollock or plaice can work in a pinch, but avoid oily fish like mackerel. Fresh fish from a trusted fishmonger is ideal, but frozen fillets are a solid, budget-friendly option if thawed properly.
Fresh vs. Frozen Fish: A Comparison
| Aspect | Fresh Fish | Frozen Fish |
|---|---|---|
| Flavor | Rich, ocean-fresh taste | Slightly less vibrant |
| Cost | More expensive | Budget-friendly |
| Availability | Limited by location | Widely available |
| Prep | Needs immediate use | Thaw overnight in fridge |
I’ve used both, and honestly, frozen cod from a reputable supermarket has saved me when I couldn’t get to the coast. Just pat it dry to avoid excess water messing with your batter.
Step-by-Step Guide to Perfect Fish and Chips
Making fish and chips at home is straightforward if you follow a few key steps. The goal is crispy fish and golden chips that rival your local chippy. Here’s how to do it, broken down into manageable chunks.
Preparing the Chips
Start with the chips, as they take longer. Peel and cut your potatoes into thick, ½-inch sticks for that classic chippy look. Soak them in cold water for 30 minutes to remove excess starch—this prevents soggy chips. Dry thoroughly with a clean towel before frying.
Double-Frying for Crispy Chips
- First Fry: Heat oil to 320°F (160°C). Fry chips in batches for 5–7 minutes until soft but not browned. Drain and set aside.
- Second Fry: Crank the oil to 375°F (190°C). Fry again for 2–3 minutes until golden and crispy. Sprinkle with salt immediately.
Double-frying is a game-changer. I discovered this trick after my first batch turned out limp—patience pays off here.
Making the Perfect Batter
The batter is the heart of great fish and chips. Whisk together 2 cups flour, 1 tsp baking powder, a pinch of salt, and 1.5 cups ice-cold beer or sparkling water. The batter should be thick enough to coat the fish but thin enough to drip slightly. Let it rest in the fridge for 15 minutes to keep it cold.
Batter Tips for Success
- Keep it cold: Cold batter hitting hot oil creates a crispier coating.
- Don’t overmix: A few lumps are fine; overmixing kills the airiness.
- Test it: Dip a spoon in and fry a small blob to check consistency.
I once tried using warm beer (mistake!), and the batter was heavy. Cold liquid is your friend.
Frying the Fish
Pat the fish fillets dry and season lightly with salt and pepper. Dredge in flour, shake off excess, then dip into the batter, letting extra drip off. Heat oil to 350°F (175°C) and fry each fillet for 5–7 minutes, turning once, until golden and crispy. Drain on paper towels.
Safety Tips for Frying
- Use a deep fryer or heavy-bottomed pot to maintain consistent oil temperature.
- Never overfill with oil—leave room for bubbling.
- Keep a lid nearby in case of oil splashes or fire.
My first frying attempt was chaotic until I invested in a cheap thermometer. Trust me, temperature control is everything.
Serving Suggestions
Serve your fish and chips hot with a generous splash of malt vinegar and a sprinkle of salt. Pair with homemade tartar sauce (mix mayo, chopped pickles, capers, and a squeeze of lemon) and mushy peas for authenticity. I love piling everything into a newspaper-style cone for that chippy vibe—guests always get a kick out of it.
Pros and Cons of Homemade Fish and Chips
| Pros | Cons |
|---|---|
| Control over ingredient quality | Requires time and effort |
| Cheaper than eating out | Frying can be messy |
| Customizable (e.g., gluten-free batter) | Needs careful temperature monitoring |
| Fun, rewarding cooking experience | Oil disposal can be a hassle |
Homemade fish and chips is a labor of love, but the payoff is worth it. I still smile remembering my family’s cheers when I nailed the recipe after a few tries.
Tools You’ll Need for Fish and Chips
To make the process smooth, gather these essentials:
- Deep Fryer or Heavy Pot: For safe, consistent frying.
- Thermometer: To monitor oil temperature (a must-have).
- Slotted Spoon: For safely removing fish and chips.
- Wire Rack: To drain excess oil without sogging up.
- Mandoline Slicer: For uniform chip cuts (optional but handy).
You can find affordable fryers and thermometers on Amazon or at kitchen stores like Lakeland. I started with a basic pot and thermometer, which worked fine for small batches.
Where to Source Quality Ingredients
For the best results, source fresh fish from a local fishmonger or trusted supermarket like Waitrose in the UK or Whole Foods in the US. Maris Piper potatoes are widely available at grocery stores or farmers’ markets. If you’re in a pinch, online retailers like The Fish Society deliver high-quality fish to your door.
People Also Ask (PAA)
Based on Google’s PAA for “fish and chips at home,” here are common questions:
What’s the best fish for fish and chips?
Cod and haddock are the top choices for their flaky texture and mild flavor. Cod is slightly more neutral, while haddock has a subtle sweetness. Both work beautifully in a crispy batter.
Can you make fish and chips without beer?
Yes! Swap beer for sparkling water or soda water to keep the batter light. The carbonation is key to achieving that airy, crispy texture, so don’t use flat water.
How do you keep batter crispy?
Keep the batter and fish cold before frying, use high-starch potatoes for chips, and fry at the right temperature (350°F for fish, 375°F for chips). Drain on a wire rack, not paper towels, to avoid sogginess.
Is fish and chips healthy?
Traditional fish and chips is indulgent due to the frying, but you can lighten it up by using an air fryer or baking the fish. Pair with a side salad instead of mushy peas for a healthier twist.
FAQ Section
Can I bake fish and chips instead of frying?
Yes, for a healthier option, coat the fish in batter and bake at 425°F (220°C) for 20–25 minutes, flipping halfway. Bake chips at the same temperature for 30–40 minutes, tossing occasionally. It won’t be as crispy, but it’s still tasty.
What’s the best oil for frying fish and chips?
Vegetable or canola oil is ideal due to their high smoke point and neutral flavor. Avoid olive oil, as it burns at lower temperatures and can impart a strong taste.
How do I make gluten-free fish and chips?
Use gluten-free flour (like rice flour) for the batter and dredging. Ensure your beer is gluten-free, or use sparkling water. Double-check all seasonings for hidden gluten.
Can I reuse frying oil?
Yes, if filtered and stored properly. Strain cooled oil through a fine mesh or cheesecloth and store in an airtight container in a cool, dark place. Reuse up to 3–4 times for best quality.
How do I make mushy peas?
Boil 2 cups of frozen peas, mash with a fork, and mix with 1 tbsp butter, a splash of cream, and a pinch of salt. For extra flavor, add fresh mint or a squeeze of lemon.
Tips for Success and Common Mistakes to Avoid
- Don’t skip soaking the potatoes: It removes starch for crispier chips.
- Avoid overcrowding the fryer: Fry in small batches to maintain oil temperature.
- Check fish doneness: The internal temperature should reach 145°F (63°C).
- Don’t reuse old oil: It can make your food taste rancid.
I once overcrowded my pot, and the oil temperature dropped, leaving me with greasy fish. Lesson learned: give everything space to fry properly.
Why Homemade Fish and Chips Is Worth It
There’s something deeply satisfying about mastering fish and chips at home. The crunch of the batter, the fluffiness of the chips, and the tangy hit of malt vinegar create a meal that’s pure joy. Plus, you can tweak it to your taste—maybe a spicier batter or extra-crispy chips. My first successful batch was a triumph after a few flops, and the look on my friends’ faces when they tasted it? Priceless. So grab your ingredients, heat up that oil, and bring a slice of Britain to your kitchen. You’ve got this.