Who doesn’t love biting into a warm, fluffy donut, fresh from the kitchen? The sweet aroma, the soft texture, and that perfect glaze dripping down the sides—it’s pure bliss. If you’ve ever thought making donuts at home was too complicated, I’m here to change your mind. As someone who’s spent countless weekends perfecting homemade treats (and yes, cleaning up flour explosions), I can tell you that making donuts is easier than you think. This beginner-friendly guide will walk you through a simple donut recipe, tips for success, and everything you need to create bakery-worthy treats at home. Let’s dive into the delicious world of homemade donuts!
Why Make Donuts at Home?
Homemade donuts are a game-changer. You control the ingredients, customize the flavors, and enjoy them fresh—something store-bought donuts can’t match. Plus, it’s a fun activity for weekends, family gatherings, or even a cozy solo baking session. The best part? You don’t need to be a pro baker to nail this recipe.
The Joy of Fresh Donuts
There’s something magical about eating a donut you made yourself. The warmth, the softness, and the pride of creating something delicious make every bite extra special. Whether you’re sharing them with friends or savoring them with coffee, homemade donuts bring a sense of accomplishment and joy.
Cost Savings of DIY Donuts
Making donuts at home is budget-friendly. Basic ingredients like flour, sugar, and yeast are inexpensive, and you can make a dozen donuts for less than the price of a single coffee shop treat. Plus, you can reuse pantry staples, making this a wallet-friendly indulgence.
Ingredients for Easy Homemade Donuts
Before we start, let’s gather the essentials. This recipe uses simple ingredients you likely already have. I remember my first time making donuts—I was shocked at how few items I needed to create something so delicious!
What You’ll Need
- All-purpose flour: 3 cups (spooned and leveled for accuracy).
- Granulated sugar: ¼ cup for the dough, plus extra for glaze.
- Active dry yeast: 2¼ teaspoons (one standard packet).
- Milk: ¾ cup, warmed to about 110°F (lukewarm).
- Unsalted butter: 3 tablespoons, melted.
- Egg: 1 large, at room temperature.
- Salt: ½ teaspoon for flavor balance.
- Vegetable oil: For frying (about 4–6 cups, depending on your pot).
- Powdered sugar: 1 cup for a simple glaze.
- Vanilla extract: 1 teaspoon for glaze flavor.
- Water or milk: 2–3 tablespoons for glaze consistency.
Optional Add-Ins
- Cinnamon: ½ teaspoon for a warm, cozy flavor in the dough.
- Sprinkles: For fun, colorful decoration.
- Chocolate: Melted for a decadent glaze option.
Tools for Making Donuts
You don’t need fancy equipment to make great donuts. Here’s what I use in my kitchen, and trust me, it’s all beginner-friendly.
Essential Tools
- Mixing bowls: For combining dough ingredients.
- Measuring cups and spoons: Precision is key for baking.
- Rolling pin: To roll out the dough evenly.
- Donut cutter: A 3-inch round cutter works, or use a glass and a bottle cap for the hole.
- Deep pot or fryer: For frying at a consistent temperature.
- Thermometer: To monitor oil temperature (aim for 350°F).
- Slotted spoon: For safely removing donuts from oil.
- Cooling rack: To let donuts drain and cool.
Where to Get Donut-Making Tools
You can find these tools at stores like Walmart, Target, or Amazon. For example, a basic donut cutter costs around $5–$10 online. If you’re on a budget, improvise with household items like a glass and a small lid for cutting.
Step-by-Step Easy Donut Recipe
This recipe makes about 10–12 classic yeast donuts, perfect for beginners. Follow these steps, and you’ll be enjoying warm, fluffy donuts in no time. My first batch wasn’t perfect (a bit lopsided, honestly), but they were still delicious!
Step 1: Activate the Yeast
In a small bowl, combine warm milk (110°F) with 1 tablespoon of sugar and the yeast. Let it sit for 5–10 minutes until foamy. This step ensures your donuts rise properly. If it doesn’t foam, your yeast might be old—grab a fresh packet.
Step 2: Mix the Dough
In a large bowl, whisk together flour, remaining sugar, and salt. Add the yeast mixture, melted butter, and egg. Stir until a soft dough forms. I like to use a wooden spoon at first, then switch to my hands for kneading.
Step 3: Knead the Dough
Turn the dough onto a lightly floured surface and knead for 5–7 minutes until smooth and elastic. It should feel soft but not sticky. If it’s too sticky, add a tablespoon of flour at a time.
Step 4: Let the Dough Rise
Place the dough in a greased bowl, cover with a clean towel, and let it rise in a warm place for 1–2 hours until doubled in size. I put mine near a sunny window, and it works like a charm.
Step 5: Shape the Donuts
Punch down the dough and roll it out to ½-inch thickness. Use a donut cutter or improvised tools to cut out rounds and holes. Place the cut donuts on a floured baking sheet, cover, and let rise for another 30 minutes.
Step 6: Fry the Donuts
Heat vegetable oil in a deep pot to 350°F. Fry donuts in batches, about 1 minute per side, until golden brown. Use a slotted spoon to transfer them to a cooling rack lined with paper towels. Keep an eye on the oil temperature to avoid greasy donuts.
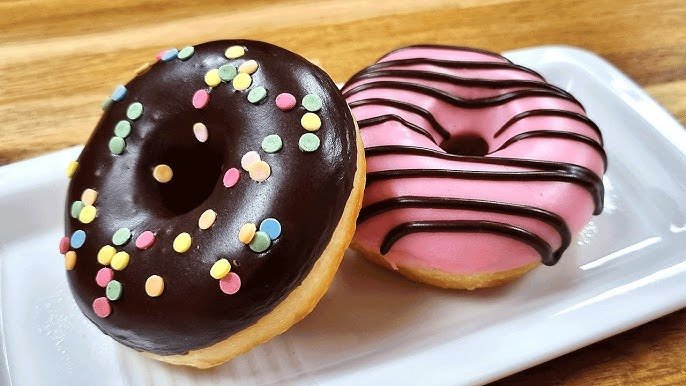
Step 7: Glaze and Decorate
Mix powdered sugar, vanilla extract, and water or milk to make a smooth glaze. Dip warm donuts into the glaze, then add sprinkles or other toppings. For a chocolate glaze, melt ½ cup chocolate chips with 1 tablespoon butter and dip away!
Tips for Perfect Donuts Every Time
Here are some hard-earned tips from my donut-making adventures to ensure your batch is a success:
- Check yeast freshness: Old yeast won’t rise, so test it first.
- Maintain oil temperature: Too hot, and donuts burn; too cool, and they get greasy.
- Don’t overcrowd the pot: Fry 2–3 donuts at a time for even cooking.
- Glaze while warm: This helps the glaze stick and soak in slightly.
Comparison: Yeast Donuts vs. Cake Donuts
| Feature | Yeast Donuts | Cake Donuts |
|---|---|---|
| Texture | Light, fluffy, airy | Dense, cakey, moist |
| Prep Time | 2–3 hours (includes rising) | 30–45 minutes |
| Difficulty | Moderate (requires kneading, rising) | Easy (no yeast, quick batter) |
| Flavor | Mild, slightly sweet | Rich, often spiced or flavored |
| Best For | Classic glazed donuts | Spiced or frosted donuts |
Why Choose Yeast Donuts?
Yeast donuts, like the ones in this recipe, are light and fluffy, making them a classic choice for beginners. They’re versatile for glazing and topping, and their airy texture feels indulgent. Cake donuts are quicker but denser, so if you want that Krispy Kreme vibe, stick with yeast.
Pros and Cons of Making Donuts at Home
Pros
- Customizable: Experiment with glazes, toppings, and fillings.
- Freshness: Nothing beats warm, just-made donuts.
- Cost-effective: Save money compared to buying from a bakery.
- Fun activity: Great for family bonding or creative kitchen time.
Cons
- Time-consuming: Yeast donuts require rising time.
- Messy process: Frying can leave your kitchen oily if not careful.
- Learning curve: It takes a batch or two to perfect the technique.
People Also Ask (PAA) Section
Can I make donuts without a donut cutter?
Yes! Use a round glass or cookie cutter for the outer circle and a small bottle cap or piping tip for the hole. It’s a budget-friendly hack that works just as well.
How do I store homemade donuts?
Store donuts in an airtight container at room temperature for up to 2 days. For longer storage, freeze unglazed donuts and reheat in the oven before glazing.
Can I bake donuts instead of frying?
Absolutely. Bake at 375°F for 10–12 minutes on a greased donut pan. They won’t be as crispy but are a healthier option.
What’s the best oil for frying donuts?
Neutral oils like vegetable or canola oil are ideal due to their high smoke point and mild flavor. Avoid olive oil, as it can impart a strong taste.
FAQ Section
1. How long do homemade donuts stay fresh?
Homemade donuts are best eaten the same day but can last up to 2 days in an airtight container. Freeze them for up to a month and reheat before serving.
2. Can I make donuts without yeast?
Yes, you can make cake donuts, which use baking powder instead of yeast. They’re quicker but have a denser texture. Search for “cake donut recipe” for specifics.
3. What’s the best glaze for beginners?
A simple powdered sugar glaze (like in this recipe) is foolproof. Mix powdered sugar, vanilla, and a splash of milk or water for a smooth, sweet coating.
4. How do I avoid greasy donuts?
Maintain the oil temperature at 350°F and avoid overcrowding the pot. Drain donuts on paper towels or a cooling rack to remove excess oil.
5. Where can I buy donut ingredients in bulk?
Check local grocery stores like Costco or online retailers like Amazon for bulk flour, sugar, and yeast. Specialty baking stores also offer high-quality ingredients.
Where to Find Donut Inspiration
For more ideas, check out baking blogs like Sally’s Baking Addiction or King Arthur Baking. Social media platforms like Pinterest and Instagram are great for creative topping ideas. Search hashtags like #HomemadeDonuts for visual inspiration.
Best Tools for Donut Success
- Donut cutter: Try the Wilton 3-Inch Donut Cutter ($6 on Amazon).
- Deep-fry thermometer: The ThermoPro Digital Thermometer ($15) is reliable.
- Donut pan: For baked donuts, the Wilton Nonstick Donut Pan ($10) is a great choice.
Final Thoughts
Making homemade donuts is a rewarding experience that anyone can master with a little patience. From mixing the dough to dipping them in glaze, every step is a chance to create something delicious. My first batch wasn’t Instagram-perfect, but the smiles around the table made it worth every second. So, grab your ingredients, roll up your sleeves, and enjoy the process. Your kitchen will soon be filled with the irresistible scent of fresh donuts—and maybe a few happy taste-testers, too!